
产品与需求
购物车功能需求
我们在忙的时候,有时突然想到要买一个东西,但是又放不下手头的事情,于是想有一个地方先记录下要买的东西;
有时候我们需要收集日常要买的东西,到时候统一购买,以便享受优惠或包邮;
有时候我们需要提前记录要购买的东西,以便在618、双十一等时间统一买;
产品设计
这个时候需要一个地方统一记录需要购买的东西,手机和电脑都可以用,随时随地记录。
所以要做一个产品,既能手机用,又能电脑用,又能随时随地用,主打就是一个方便、简单、便捷。
产品在实现购物记录功能的同时,又要可以进行用户权限管理等功能,因此也需要一个后台管理系统。
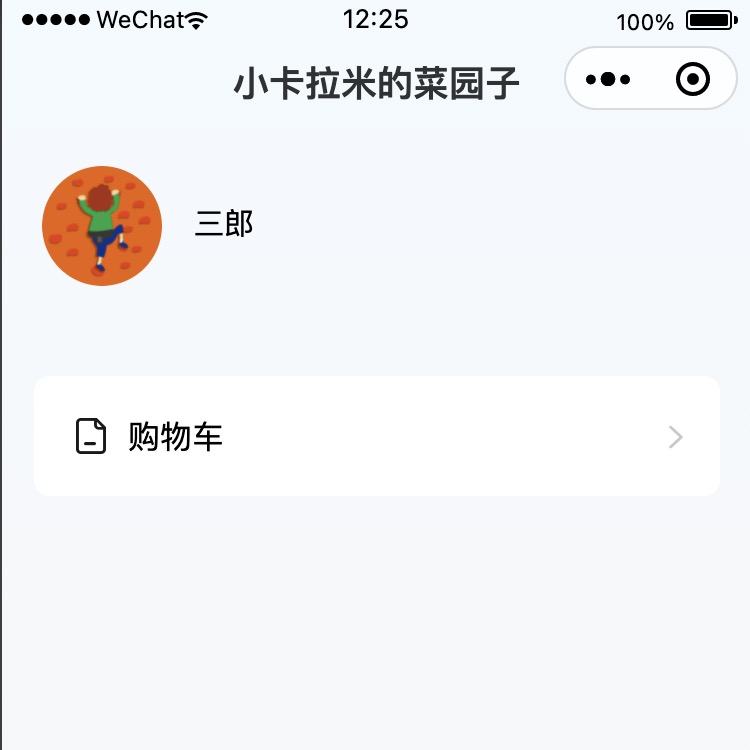
于是产品就是这样的:
小程序+pc端+后台管理。
pc端和后台管理可以合二为一,因此要做的就是一个小程序和后台管理系统,
这也是我们经常打交道的经典的产品模型:运营后台+客户端。
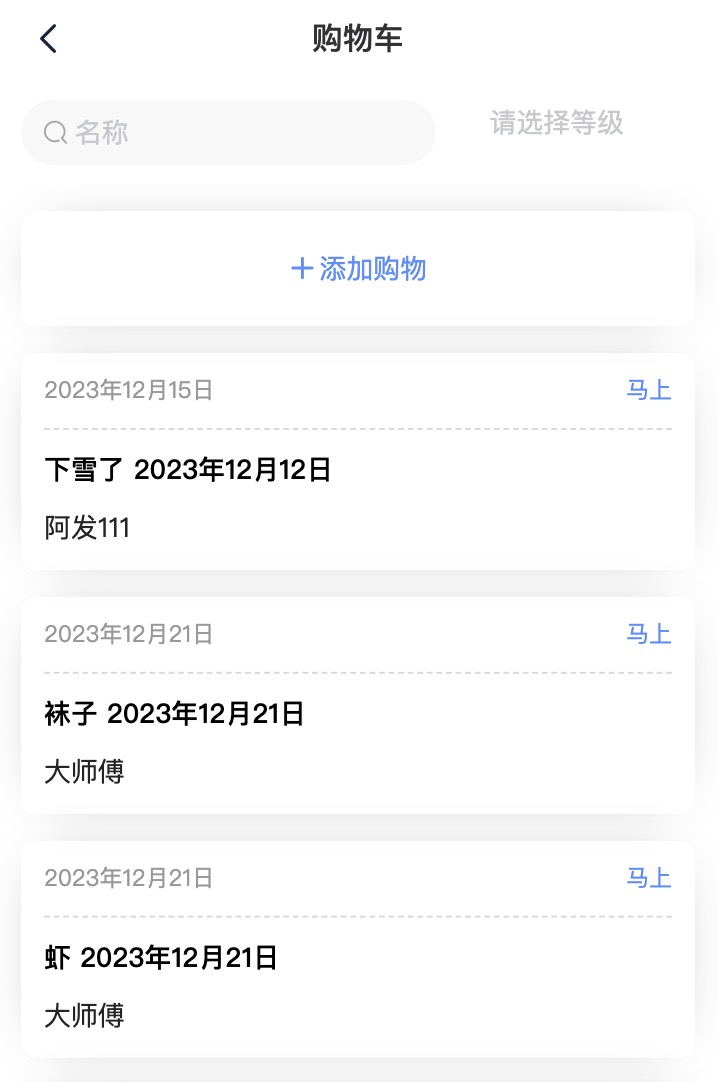
我们姑且将这个购物记录功能命名为【购物车】。
好物收藏、厨房日志
除了购物车外,我们可以延伸开发出 好物收藏、厨房日志功能,这三者功能类似,都是列表查询、详情、编辑、新增功能。
不同的是后两者增加了图片上传和拍照上传,这正是微信小程序的优势,微信小程序的拍照相册功能非常好用。
以购物车功能为例
由于购物车、好物收藏、厨房日志,三个功能类似,只需讲解其中一种功能,下面文章都讲购物车功能为例说明,其他功能类推:
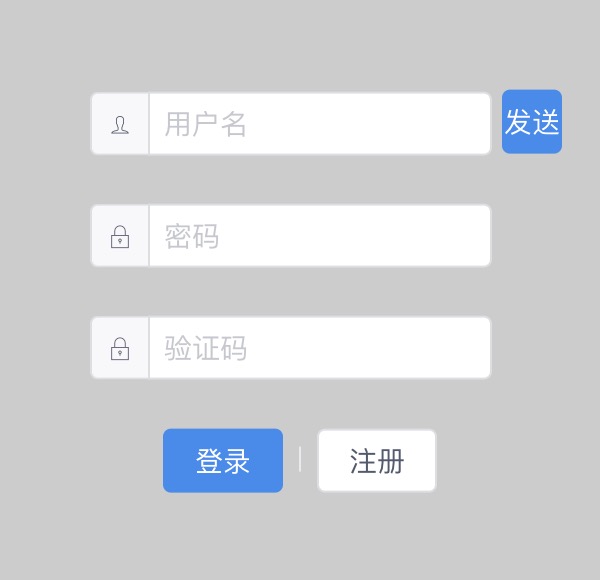
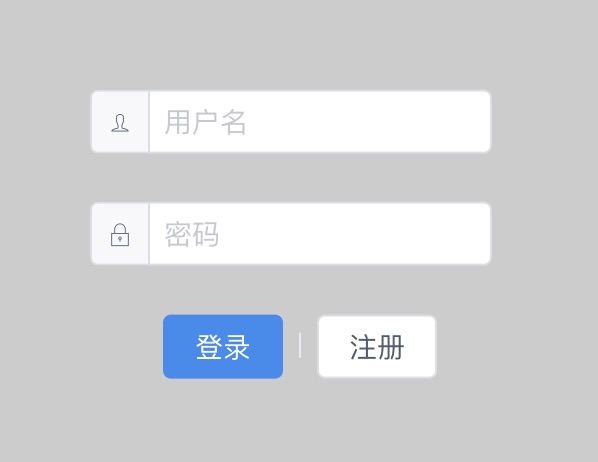
原型

架构设计
跨端代码耦合分工
考虑到产品后期一个人维护,为了减少维护成本,于是采用小程序与pc端共用一套业务逻辑代码,
业务代码,如购物列表、购物添加、编辑、详情、删除 功能采用vue+nuxt+ssr写成h5项目,以供小程序和pc端共同嵌入使用;
小程序端使用uniapp完成用户的注册、登录、我的页面逻辑,业务功能嵌入上面的h5工程;
pc端维护用户的登录、注册,以及用户管理等后台管理能力,业务功能部分嵌入上面的h5工程;
登录态设计和request登录信息携带
这里就涉及到一个登录态设计和接口传输的问题了:
h5项目不做登录等相关的页面,所有的登录信息都通过页面地址上携带username 和 accessToken,在需求复杂时,h5端可以将页面地址上的登录信息存储于cookie中。
接口请求时,将上面的信息都放到header上;
后台pc端,存储username和accessToken到cookie,接口请求与h5端项目一致;
小程序端,存储username到store上,接口请求与h5一致;
微信小程序
技术选型 uniapp + uview-ui
h5端
技术选型 nuxt+vue+ssr
后台pc端
技术选型 vue
域名网站主页静态页面
技术选型 nuxt+vue+generate
上线产品要申请域名,域名首页需要注明国家审核的网站备案号以及网站入口,所以还要写一个简单的静态主页,nuxt的特长之一就是生产静态页面,于是也选择 nuxt+vue
后端
技术选型 node+express+mongodb
服务器购买和系统选择
因为是简单的网站,便宜简单就行,
操作系统选择 centos 7的系统,因为centos 7外面的文档很多,遇到问题可以很容易搜索到解决方案。
下面是这次买的服务器配置:1
2
3
4
5
6
7
8
9
10
11
12
13
14
15
16云服务器ECS(包月)
实例名称:
iZbp1co4xxx(i-bp1coxxx)
实例:2核 2Gecs.e系列 V
I/O 优化实例:I/O 优化实例
系统盘:ESSD Entry/dev/xvda40GB模块属性
带宽:3Mbps按固定带宽
CPU:2核
可用区:随机分配
操作系统:CentOS 7.9 64位Linux64位
内存:2GB
地域:华东 1
网络类型:专有网络
体检服务:是
管家服务:是
部署
选择老牌的 nginx 和 pm2
服务端开发
项目启动
node写后台,平时写的少,因此先爬服务端的坑,
考虑到自己的业务足够简单,以及想快速交付,于是使用mongodb,它不需要写sql表,
于是网上找了一个相关的增删改查项目,启动该项目,参照原来的接口写接口,节约时间。
项目地址:点击这里,
项目采用 mongodb + express,相关的安装教程可以查阅资料。
该项目的启动介绍参考readme,
启动项目前,可手动导入一些测试数据,参考项目下的文档/sql/mongoDB命令.txt:1
2
3
4
5
6
7
8
9
10
11
12
13
14
15
16
17
18
19
20
21
22
23
24
25
26导出(mongoexport)
先进入MongoDB安装路径下bin目录(如 C:\Program Files\MongoDB\Server\4.2\bin),然后执行导入导出命令
导出数据命令:mongoexport -h dbhost -d dbname -c collectionName -o output
列子:mongoexport -h localhost:27017 -d expressdbs -c counters -o D:/proAddress/node/xxxx/sql/counters.json
-h :数据库地址,MongoDB 服务器所在的 IP 与 端口,如 localhost:27017
-d :指明使用的数据库实例,如 test
-c 指明要导出的集合,如 c1
-o 指明要导出的文件名,如 E:/wmx/mongoDump/c1.json,注意是文件而不是目录,目录不存在时会一同新建
导入(mongoimport)
先进入MongoDB安装路径下bin目录(如 C:\Program Files\MongoDB\Server\4.2\bin),然后执行导入导出命令
导入数据命令:mongoimport -h dbhost -d dbname -c collectionname 文件的地址...
例子:mongoimport -h localhost:27017 -d expressdbs -c counters D:/proAddress/node/xxxx/sql/counters.json
-h : 数据库地址,MongoDB 服务器所在的 IP 与 端口,如 localhost:27017
-d :指明使用的库,指明使用的数据库实例,如 test
-c :指明要导入的集合,如 c1、c2、可以和导出时不一致,自定义即可,不存在时会直接创建。
本地的文件地址:事先导出好的 mongoDB 集合文件
三个功能模块
一共有三个功能,
购物功能;
用户功能;
pc端还有一个权限、菜单功能
购物功能接口开发
先做比较简单的增删改查的购物功能。
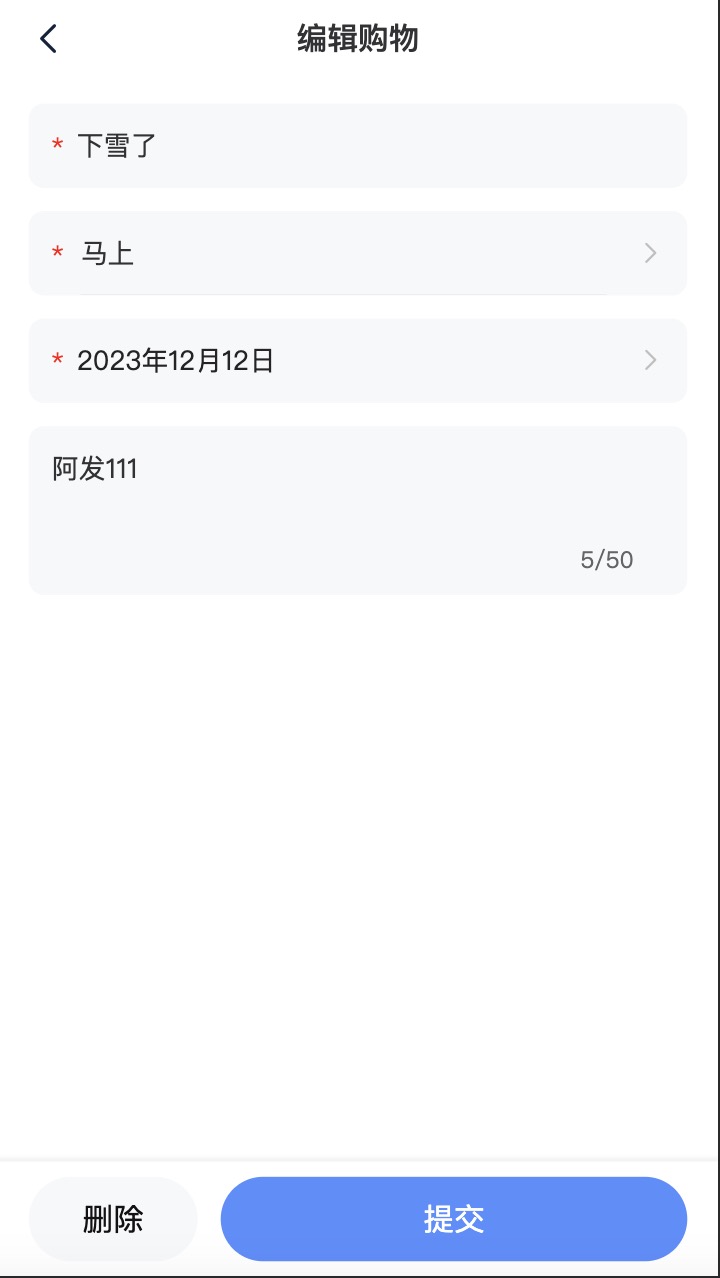
购物功能有列表、详情、新增、修改、删除接口:
以用户的维度,进行新增存储:
1
2
3
4
5
6
7
8
9
10
11
12
13
14
15
16
17
18
19
20
21
22
23
24
25
26
27
28
29
30
31
32
33
34
35
36
37
38
39
40
41
42
43
44
45
46
47
48
49/**
* @api {post} /shop/add 商品添加
* @apiName 商品添加
* @apiGroup Shop
*
* @apiParam {String} status 购买等级 1 2 3 紧急、次要、未来
* @apiParam {String} shopname 商品名
* @apiParam {String} mark 备注
* @apiParam {Number} time 购买时间
* @apiParam {String} createtime 创建时间
* @apiParam {String} username 用户
*/
router.post('/add', (req, res) => {
const { status, shopname, mark, time } = req.body
const { username: originUsername } = req.headers
const username = decodeURIComponent(originUsername)
if(!username){
res.send({ code: 500, msg: '未登录' })
return
}
if(!shopname){
res.send({ code: 500, msg: '商品必填' })
return
}
Shop.find({ shopname, username })
.then((data) => {
if (data.length === 0) {
return Shop.insertMany({ status, shopname, mark, time, username, createtime: dayjs().format('YYYY-MM-DD')})
} else {
// 商品已存在
return -1
}
})
.then((e) => {
if(e===-1){
res.send({ code: 500, msg: '商品已存在' })
return
}
res.send({ code: 200, msg: '添加成功' })
})
.catch((e) => {
console.log(e)
res.send({ code: 500, msg: '添加失败' })
})
})列表查询接口,以用户的维度查数据:
1
2
3
4
5
6
7
8
9
10
11
12
13
14
15
16
17
18
19
20
21
22
23
24
25
26
27
28
29
30
31
32
33
34
35
36
37
38
39
40
41
42
43
44
45
46
47
48
49
50
51
52
53
54
55
56
57
58
59
60
61
62
63
64
65
66/**
* @api {post} /shop/page 商品列表
* @apiName 商品列表
* @apiGroup Shop
*
* @apiParam {Number} pageNo 页数
* @apiParam {Number} pageSize 条数
* @apiParam {Number} key 关键字查询
*/
router.post('/list', (req, res) => {
const pageNo = Number(req.body.pageNo) || 1
const pageSize = Number(req.body.pageSize) || 10
const shopname = req.body.shopname
const status = req.body.status
const { username: originUsername } = req.headers
const username = decodeURIComponent(originUsername)
if(!username){
res.send({ code: 500, msg: '未登录' })
return
}
const reg = new RegExp(username)
let query = { $or: [{ username: {$regex: reg}}] }
if(shopname){
query['$or'][0].shopname = {$regex: new RegExp(shopname)}
}
if(status){
query['$or'][0].status = Number(status)
}
Shop.countDocuments(query, (err, count) => {
if (err) {
res.send({ code: 500, msg: '商品列表获取失败' })
return
}
Shop.aggregate([
{
$match: query
},
{
$skip: pageSize * (pageNo - 1)
},
{
$limit: pageSize
},
{
// $project中的字段值 为1表示筛选该字段,为0表示过滤该字段
$project: { foodtypes: { _id: 0 } }
}
], function(err, docs) {
if (err) {
res.send({ code: 500, msg: '商品列表获取失败' })
return;
}
res.send({
code: 200,
data: docs,
total: count,
pageNo: pageNo,
pageSize: pageSize,
msg: '商品列表获取成功',
})
})
})
})
使用 Postman 进行接口测试
写好接口后,使用 Postman 进行接口测试。
用户功能pc端接口开发
这块因为涉及到小程序,所以复杂了点。
先搞定pc端的用户需求,
用户注册、登录、详情接口,其他修改密码等接口放到以后去做。
注册接口:
1
2
3
4
5
6
7
8
9
10
11
12
13
14
15
16
17
18
19
20
21
22
23
24
25
26
27
28
29
30
31
32
33
34
35
36
37
/**
* @api {post} /user/reg 用户注册
* @apiName 用户注册
* @apiGroup User
*
* @apiParam {String} us 用户名(邮箱)
* @apiParam {String} ps 用户密码
* @apiParam {String} openid 小程序openid
* @apiParam {code} ps 验证码
*
* @apiSuccessExample Success-Response:
* HTTP/1.1 200 OK
* {
* "code": "200",
* "msg": "创建成功"
* }
*/
// 小程序和pc web的注册,通过 us 用户名进行关联,如果用户名一样,则说明是同一用户,此用户同时保存 ps 和 openid
router.post("/reg", (req, res) => {
let { us, ps, openid } = req.body;
if (!us || (!ps && !openid) ) return res.send({ code: 500, msg: "缺少参数" });
User.find({ us })
.then((data) => {
const time = new Date().getTime();
if (data.length === 0) {
User.insertMany({ us, ps, openid, time });
res.send({ code: 200, msg: "创建成功" });
return
} else {
res.send({ code: 500, msg: "用户名已存在" });
}
}).catch((err) => {
if(!err) return
console.log(err)
res.send({ code: 500, msg: "创建失败" });
});
});登录接口:
1
2
3
4
5
6
7
8
9
10
11
12
13
14
15
16
17
18
19
20
21
22
23
24
25
26
27
28
29
30
31
32
33
34
35
36
/**
* @api {post} /user/login 用户登录
* @apiName 用户登录
* @apiGroup User
*
* @apiParam {String} us 用户名(邮箱)
* @apiParam {String} ps 用户密码
* @apiParam {String} openid 小程序openid
*
* @apiSuccessExample Success-Response:
* HTTP/1.1 200 OK
* {
* "code": "200",
* "msg": "登录成功"
* }
*/
router.post("/login", (req, res) => {
let { us, ps, openid } = req.body;
if (!us || (!ps && !openid)) return res.send({ code: 500, msg: "缺少参数" });
User.find({ us })
.then((datas) => {
if(datas && !datas.length) res.send({ code: 500, msg: "账号或密码不正确" });
const data = datas.find(item=> item.ps === ps || item.openid === openid)
if (data) {
// if (!data.state) return res.send({ code: 502, msg: "账号已被禁用" });
let token = setToken({ login: true, name: us, roleId: data.roleId });
res.send({ code: 200, msg: "登录成功", token });
} else {
res.send({ code: 500, msg: "账号或密码不正确" });
}
})
.catch(() => {
res.send({ code: 500, msg: "登录失败" });
});
});
用户详情接口就不贴了。
postman测试
写好后,用postman测试一遍。
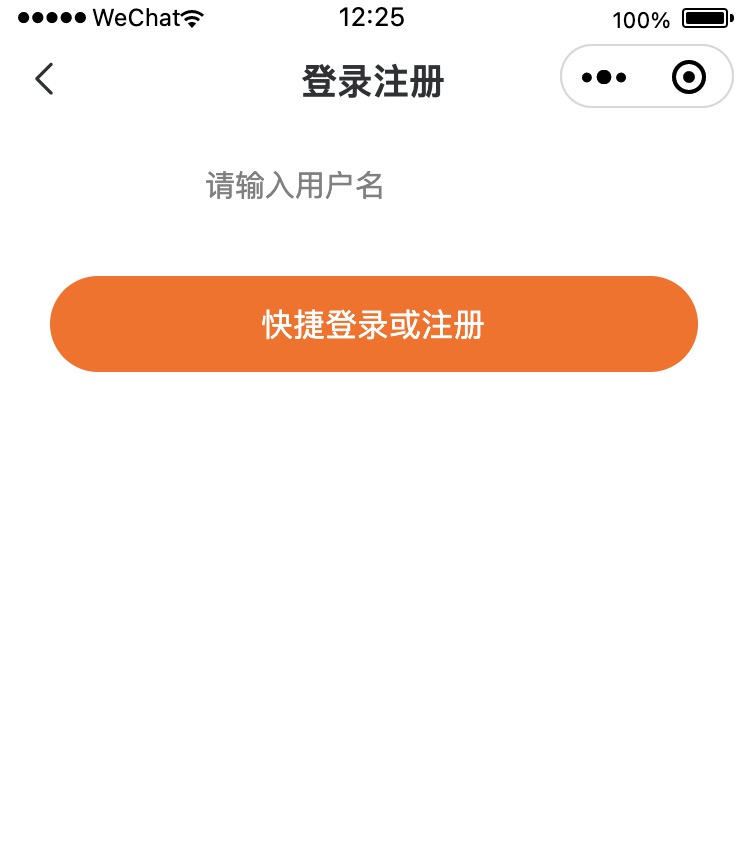
用户功能小程序接口开发
如何跟pc端账号打通
这里涉及到小程序账号如何跟pc端账号打通的问题,
经过一番调研后,由于应用场景简单,决定使用openid用来关联微信号,
小程序注册时,设置与pc端一致的username,凭借 username实现数据共享账号关联。
获取openid的方式参考这里:
https://developers.weixin.qq.com/community/develop/article/doc/000c80906b4210625f3bde3775bc131
2
3
4
5
6
7
8
9
10
11
12
13
14
15
16
17
18
19
20
21
22
23
24
25
26
27
28
29
30
31
32
33
34
35
36
37
38
39
40
41
42
43
44
45async success(data) {
if (data.code) {
const openidRes = await _this.$request.get(`/wx/getOpenid`, {
params: {
code: data.code,
},
})
if (openidRes.code !== 200) {
if (!openidRes.data.openid) {
uni.showToast({
title: openidRes.msg,
icon: 'none',
})
return
}
}
// 注册
const res = await _this.$request.post(`/user/reg`, {
us: _this.username,
openid: openidRes.data.openid,
})
if (res.code === 200) {
_this.$store.commit('user/setUserInfo', { username: _this.username })
uni.$emit('loginSuccess')
uni.showToast({
title: '登录成功',
duration: 1500,
icon: 'success',
mask: true,
})
setTimeout(() => {
uni.navigateBack({
delta: 1,
})
}, 1500)
} else {
uni.showToast({
title: res.msg,
icon: 'none',
})
}
} else {
console.log('登录失败!' + data.errMsg)
}
}
服务端接口 getOpenid
1 | router.get("/getOpenid", (req, res) => { |
注册接口做兼容:
1 | const existUser = data[0] |
小程序用户功能设计的优化
微信手机号码代替上面的openid关联微信号,
因为openid在不同手机的同一个微信号是不一样的。
在第一次打开小程序使用手机号码授权,注册小程序后,将用户信息存储到小程序的store上,
后续请求不再重新请求用户信息,直接读取store上的用户信息。
可以采用手机号关联微信,第一次注册完成存储用户详情和登录信息到store,
后续不再请求,直接使用store中的信息,直到主动删除小程序store后,触发再次登录。
这样就避免了,每次打开小程序都要进行手机号授权才能拿到手机号,查询用户信息。
前端逻辑也更加简单。
另外还有菜单和权限接口,这个不是最重要的,可以简单来,因为用户管理不是主功能,可以直接操作mongodb数据库进行修改。
使用postman测试
接口做好后,用postman测试。
接口搞定后,可以写前端项目了。
前端开发
这部分直接上项目地址
h5端
采用vue2+nuxt+ssr,项目地址。
微信小程序
采用uni-app + uview-ui,项目地址。
如果小程序使用uni-app,建议h5端使用vue,因为一旦uniapp需要重写h5页面的时候,直接挪过来很快就能修改好,因为二者都是vue语法。
后台pc端
这部分简单,继续用网上找的项目,项目地址
网站静态主页
这部分简单,继续用网上找的项目,项目地址
部署到服务器
nginx
nginx完整配置如下:1
2
3
4
5
6
7
8
9
10
11
12
13
14
15
16
17
18
19
20
21
22
23
24
25
26
27
28
29
30
31
32
33
34
35
36
37
38
39
40
41
42
43
44
45
46
47
48
49
50
51
52
53
54
55
56
57
58
59
60
61
62
63
64
65
66
67
68
69
70
71
72
73
74
75
76
77
78
79
80
81
82
83
84
85
86
87
88
89
90
91
92
93
94
95
96
97
98
99
100
101
102
103user root;
worker_processes 1;
#error_log logs/error.log;
#error_log logs/error.log notice;
#error_log logs/error.log info;
#pid logs/nginx.pid;
events {
worker_connections 1024;
}
http {
include mime.types;
default_type application/octet-stream;
sendfile on;
#tcp_nopush on;
#keepalive_timeout 0;
keepalive_timeout 65;
#gzip on;
server {
listen 80;
server_name localhost;
#charset koi8-r;
#access_log logs/host.access.log main;
location / {
root html;
index index.html index.htm;
}
location /klm {
proxy_pass http://localhost:8870;
}
location /web {
# add_header Access-Control-Allow-Origin *;
# add_header Access-Control-Allow-Methods 'GET, POST, OPTIONS';
root /root/xnbz-web/dist;
index index.html index.htm;
}
error_page 500 502 503 504 /50x.html;
location = /50x.html {
root html;
}
}
# HTTPS server
#
server {
listen 443 ssl;
server_name localhost;
ssl_certificate   /usr/local/nginx/conf/cert/xnbz.site.pem;     #.pem采用Base64-encoded的PEM格式文本文件
ssl_certificate_key  /usr/local/nginx/conf/cert/xnbz.site.key;  #.key文件:证书的私钥文件
ssl_session_cache shared:SSL:1m;
ssl_session_timeout 5m;
ssl_ciphers HIGH:!aNULL:!MD5;
ssl_prefer_server_ciphers on;
location / {
root html;
index index.html index.htm;
}
location /klm {
proxy_pass http://localhost:8870;
}
location /web {
# add_header Access-Control-Allow-Origin *;
# add_header Access-Control-Allow-Methods 'GET, POST, OPTIONS';
root /root/xnbz-web/dist;
index index.html index.htm;
}
location /api {
add_header Access-Control-Allow-Origin *;
add_header Access-Control-Allow-Methods 'GET, POST, OPTIONS';
add_header 'Access-Control-Allow-Headers' 'Origin, X-Requested-With, Content-Type, Accept';
proxy_pass http://localhost:6166;
proxy_set_header Host $host;
}
}
}
配置h5端
nginx
h5是nuxt ssr项目,所以只要匹配到后,直接转发到项目下就行。1
2
3
4#nginx配置
location /klm {
proxy_pass http://localhost:8870;
}
发布脚本与pm2
h5项目采用pm2部署
项目先 npm run build:prod,
然后再执行 pm2 start pm2.json
1 | "build:prod": "cross-env KLM_ENV=prod nuxt build", |
1 | // pm2.json |
踩坑:必须要先执行 build:prod
要注意的是,h5项目必须要先执行 npm run build:prod, 然后运行 nuxt start (pm2)才能部署成功,否则会失败。
后台pc端
后台是vue项目
nginx
1 | #nginx配置 |
项目vue.config.js配置
1 | VUE_APP_PUBLICPATH = '/web/' |
1 | // vue.config.js |
踩坑:必须要设置outputDir
若不设置,则静态文件404,可以看生成的html中的script引用。
服务端
nginx
1 | #nginx |
踩坑:nginx代理后请求报错
注意要加上 proxy_set_header Host $host; 否则会请求报错。
至此,整个工程在线下功能算串好了。
申请域名
参考 阿里云域名注册和备案图文详细讲解
需要经过阿里和国家工业信息部审核,过程需要七八天审核通过。
写一个网站静态首页
审核通过的网站,需要在网站底下显示备案号,
因此需要写一个网站静态首页,项目情况可查看上面介绍 :1
nuxt generate
然后写一个发布脚本,省时省力1
2
3
4
5
6
7
8import 'zx/globals'; // 注意要使用 4.3.0或以下版本,此版本编译后的源码,支持commonjs,高版本是esmodule,无法被 node 14 直接支持运行
(async () => {
await $`npm run generate`;
// 编译好后,发送到服务器
$`scp -r dist/* root@47.99.xx.xx:/usr/local/nginx/html`;
})();
升级https
由于微信的后台接口需要https,于是用nginx升级https。
去阿里云控制台,根据提示,完成以下操作:
- 申请免费证书
- 部署到域名内,
- 生成证书秘钥。
将证书部署到nginx:1
2ssl_certificate /usr/local/nginx/conf/cert/xnbz.site.pem; #.pem采用Base64-encoded的PEM格式文本文件
ssl_certificate_key /usr/local/nginx/conf/cert/xnbz.site.key; #.key文件:证书的私钥文件
申请微信小程序备案
小程序备案申请大概需要两三天。
插曲
个人小程序无法使用webview嵌入,企业小程序可以。
好在h5端是vue写的,直接把h5端代码拷贝到 uni app小程序项目内,修修改改,两三个小时就改好了。
线上调试bug
查看express接口日志
下面是log中间件的逻辑代码1
2
3
4
5
6
7
8
9
10
11
12
13
14
15
16
17
18
19
20// 根目录下serve.js
// logger
app.all("*", async (req, res, next) => {
//响应开始时间
const start = new Date();
//响应间隔时间
var ms;
try {
//开始进入到下一个中间件
await next();
//记录响应日志
ms = new Date() - start;
log.i(req, ms);
} catch (error) {
//记录异常日志
ms = new Date() - start;
log.e(req, error, ms);
}
console.log(`${req.method} ${req.url} - ${ms}ms-${res.statusCode}`);
});
因此日志在 logs/responses 目录下。
postman 代入参数模拟
在这里可以拿到请求的参数,然后用postman使用这些参数,进行模拟。
踩坑
nginx出现403错误的解决方法
1 | 于是查看nginx日志,路径为/var/log/nginx/error.log。打开日志发现报错Permission denied,详细报错如下: |
翻看上面的nginx完整配置,就是加了句声明用户名的代码解决的:1
user root;
查看 ps aux | grep “nginx: worker process” 查看nginx的登录用户
nginx重启等操作时异常报错
有时候nginx重启或运行报错,就是因为没有重新运行nginx,且运行时,没有指定配置文件,
可以先不要执行其他命令,直接运行nginx,并且一定要带上制定配置文件:1
nginx -c /usr/local/nginx/conf/nginx.conf
request header携带中文username时需要转义
中文username 没有encode ,请求报错
其他
服务器常用命令
1 | # 连接服务器 |
pm2常用命令
1 | pm2 |
nginx常见命令
查看nginx是否运行(是否有进程)ps -ef | grep nginx1
2
3
4
5
6[root@xxx db]# ps -ef | grep nginx
root 5215 4693 0 18:56 pts/0 00:00:00 grep --color=auto nginx #这个不是nginx进程,不用管
#这个是nginx进程21403,而且是master进程,可以看到进程的运行命令 nginx -c /usr/local/nginx/conf/nginx.conf
root 21403 1 0 Dec16 ? 00:00:00 nginx: master process nginx -c /usr/local/nginx/conf/nginx.conf
#这个是上面master进程21403的worker子进程
root 21588 21403 0 Dec16 ? 00:00:03 nginx: worker process
如果要关闭进程,只需要关闭 nginx 主进程21403即可
1 | nginx -t #查看nginx的安装目录或配置目录 该方法也是测试配置文件是否有效 |
mongodb命令和mac安装
mongo的mac安装
mac 安装 使用brew 参考
安装目录 /opt/homebrew/opt/mongodb-community
mongodb相关命令
1 | brew services start mongodb-community@4.4 |
github 加速
页面访问github流畅,终端git操作比较慢的解决方法:
一招 git clone 加速1
2
3# socks5协议,1080端口修改成自己的本地代理端口
git config --global http.https://github.com.proxy socks5://127.0.0.1:1080
git config --global https.https://github.com.proxy socks5://127.0.0.1:1080
后续
叠加以下两个功能:
- 好物记录
- 好菜记录(厨师成长记)