
Nginx 服务器
介绍
概述
关于 Nginx,参考博客
摘录博客部分内容:
反向代理:
反向代理,”它代理的是服务端,代服务端接收请求”,主要用于服务器集群分布式部署的情况下,反向代理隐藏了服务器的信息。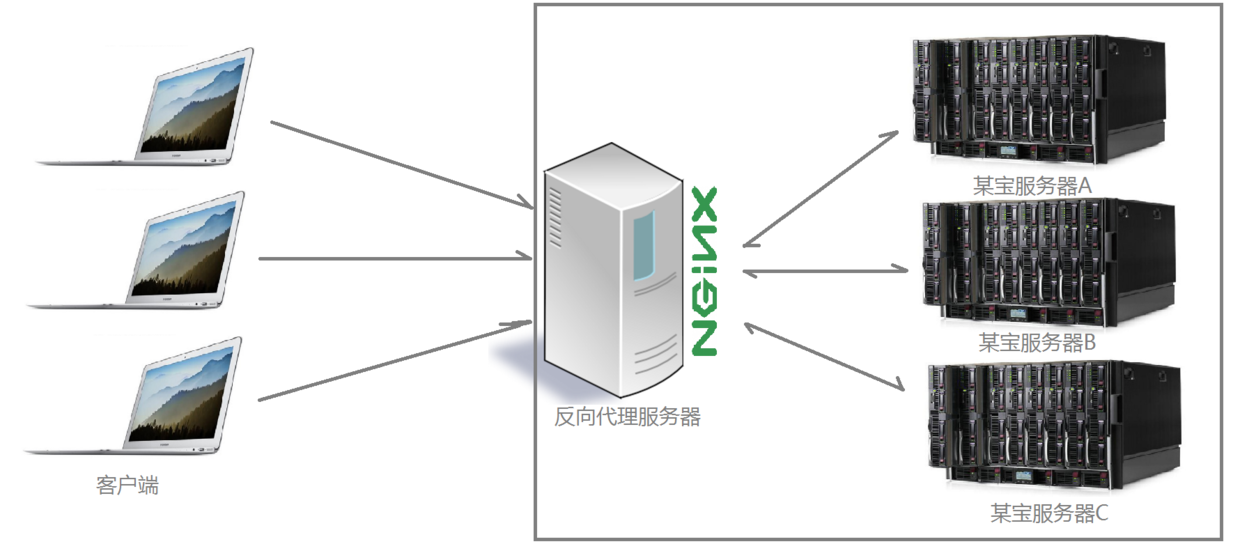
正向代理:
正向代理最大的特点是客户端非常明确要访问的服务器地址;服务器只清楚请求来自哪个代理服务器,而不清楚来自哪个具体的客户端;正向代理模式屏蔽或者隐藏了真实客户端信息。
apache、nginx、IIS
高性能、轻量级、功能丰富、配置简单。用c语言写的;
2004年发布第一版
apache、nginx、IIS 并称 服务器三巨头
apache 阻塞型、同步多进程。nginx 异步、非阻塞、事件驱动;
下图时服务器排名: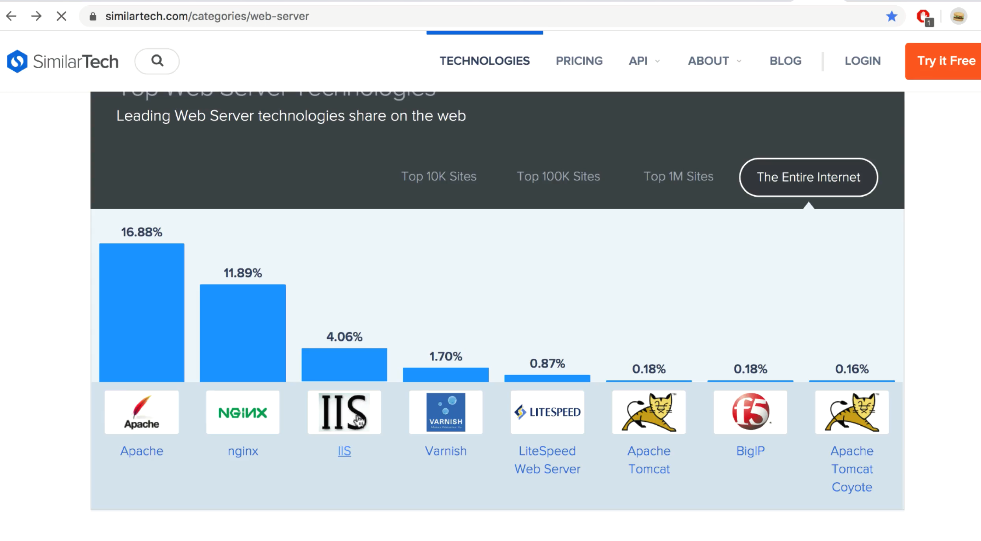
安装和使用nginx
安装
1 | yum install epel-release 红帽系列额外包,nginx安装依赖此包 |
两种启动方式
方式一:
直接命令行 输入 nginx;
方式二:systemctl start nginx
启动后访问,这里会出现centos页面,此页面是nginx驱动的页面,
可在/usr/share/nginx/html/index.html中配置
http://192.168.1.109/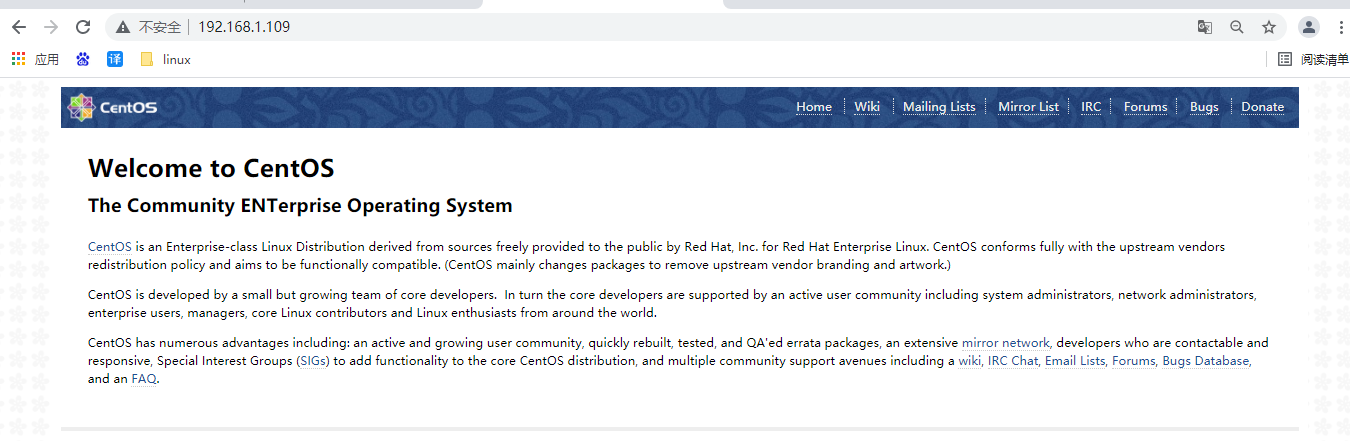
1 | [root@localhost ~]# rpm -ql nginx 查看nginx相关配置 |
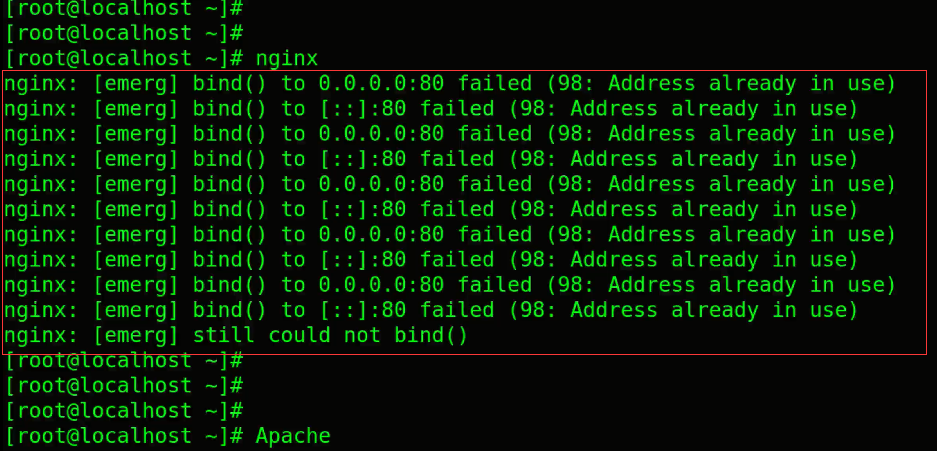
启动nginx失败的解决方法
当然了,你也可能启动nginx失败,可能的原因是,你的机器同时启动了apache,
apache和nginx都是监听80端口,因此失败。
1 | #解决之道,可关闭 apache,再次启动nginx: |
nginx语法
全局变量
没有用花括号包含的,就是全局变量,比如下面就是全局变量:1
2
3
4user nginx;
worker_processes auto;
error_log /var/log/nginx/error.log;
pid /run/nginx.pid;
花括号(局部变量 和 区块)
如下,events的相关区块信息都定义在花括号内,花括号内定义的变量是局部变量:1
2
3events {
worker_connections 1024;
}
定义一个名字
如下1
2
3
4
5
6
7
8
9http {
#log_format定义了日志的格式以 右侧一长串字符串格式形式,
#因为access_log也要用到这串长字符串,因此log_format给字符串定义了一个名字 main
log_format main '$remote_addr - $remote_user [$time_local] "$request" '
'$status $body_bytes_sent "$http_referer" '
'"$http_user_agent" "$http_x_forwarded_for"';
access_log /var/log/nginx/access.log main; #main代表了上面的长字符串
}
include 导入
相当于import,在配置中导入其他配置文件1
include /etc/nginx/conf.d/*.conf;
以分号结尾
代码行以分号结尾,如:1
worker_connections 1024;
nginx 其他知识介绍
server (虚拟主机 和 端口服务等)
nginx 的 server 相当于 apache的虚拟主机:1
2
3
4
5
6
7
8
9
10
11
12
13
14
15
16
17
18
19
20server {
listen 80 default_server;
listen [::]:80 default_server;
server_name _;
root /usr/share/nginx/html;
# Load configuration files for the default server block.
include /etc/nginx/default.d/*.conf;
location / {
}
error_page 404 /404.html;
location = /404.html {
}
error_page 500 502 503 504 /50x.html;
location = /50x.html {
}
}
全局变量含义介绍
1 | user nginx; #说明用户是nginx |
nginx主配置文件
以下是主配置文件,这里注释一些上面没有解释到的内容,1
2
3
4
5
6
7
8
9
10
11
12
13
14
15
16
17
18
19
20
21
22
23
24
25
26
27
28
29
30
31
32
33
34
35
36
37
38
39
40
41
42
43
44
45
46
47
48
49
50
51
52
53
54
55
56
57
58
59
60
61
62
63
64
65
66
67
68
69
70
71
72
73
74
75
76
77
78
79
80
81
82
83
84
85
86
87
88
89
90[root@localhost nginx]# cat /etc/nginx/nginx.conf
# For more information on configuration, see:
# * Official English Documentation: http://nginx.org/en/docs/
# * Official Russian Documentation: http://nginx.org/ru/docs/
user nginx;
worker_processes auto;
error_log /var/log/nginx/error.log;
pid /run/nginx.pid;
# Load dynamic modules. See /usr/share/doc/nginx/README.dynamic.
include /usr/share/nginx/modules/*.conf;
events {
worker_connections 1024;
}
http {
log_format main '$remote_addr - $remote_user [$time_local] "$request" '
'$status $body_bytes_sent "$http_referer" '
'"$http_user_agent" "$http_x_forwarded_for"';
access_log /var/log/nginx/access.log main;
sendfile on;
tcp_nopush on;
tcp_nodelay on;
keepalive_timeout 65;
types_hash_max_size 2048;
include /etc/nginx/mime.types;
default_type application/octet-stream;
# Load modular configuration files from the /etc/nginx/conf.d directory.
# See http://nginx.org/en/docs/ngx_core_module.html#include
# for more information.
include /etc/nginx/conf.d/*.conf;
server {
listen 80 default_server; #nginx默认使用80端口,这是针对 ipv4
listen [::]:80 default_server; #nginx默认使用80端口,这是针对 ipv6
server_name _;
root /usr/share/nginx/html;
# Load configuration files for the default server block.
include /etc/nginx/default.d/*.conf;
location / {
}
error_page 404 /404.html;
location = /404.html {
}
error_page 500 502 503 504 /50x.html;
location = /50x.html {
}
}
# Settings for a TLS enabled server. #nginx定义https
#
# server {
# listen 443 ssl http2 default_server;
# listen [::]:443 ssl http2 default_server;
# server_name _;
# root /usr/share/nginx/html;
#
# ssl_certificate "/etc/pki/nginx/server.crt";
# ssl_certificate_key "/etc/pki/nginx/private/server.key";
# ssl_session_cache shared:SSL:1m;
# ssl_session_timeout 10m;
# ssl_ciphers HIGH:!aNULL:!MD5;
# ssl_prefer_server_ciphers on;
#
# # Load configuration files for the default server block.
# include /etc/nginx/default.d/*.conf;
#
# location / {
# }
#
# error_page 404 /404.html;
# location = /404.html {
# }
#
# error_page 500 502 503 504 /50x.html;
# location = /50x.html {
# }
# }
}
配置nginx为反向代理,设置https
配置https方案
本例展示 nginx 反向代理 apache tomcat的Jenkins 服务器。
因为 nginx apache 共同监听了 80 和 443端口,
因此第一步 修改 apache 的80 443端口;
过程中,为了方便理解,首先不急于直接配置https,而是先配置 nginx http 的方向代理
然后 再配置 nginx https 的反向代理;
修改apache
修改apache 80 443 端口
- 修改apache 80 443 端口
1
2
3
4
5
6
7
8
9
10
11
12
13
14
15
16
17vim /etc/httpd/conf/httpd.conf
#将原来的
#Listen 80
#改为
#Listen 7080 http
vim /etc/httpd/conf.d/ssl.conf
#将原来的
#Listen 443 https
#改为
#Listen 7443 https
将原来的
#<VirtualHost _default_:443>
#改为
#<VirtualHost _default_:7443>
重启apache报错
1 | [root@localhost ~]# systemctl restart httpd |
SElinux 增加端口7080 7443
1 | [root@localhost ~]# semanage port -l | grep http #查看SElinux与 http相关的端口 |
防火墙 增加端口7080 7443
1 | [root@localhost ~]# firewall-cmd --list-ports |
访问网站
http://192.168.1.109:7080/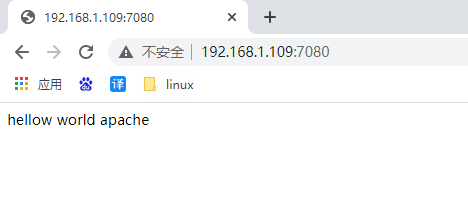
https://192.168.1.109:7443/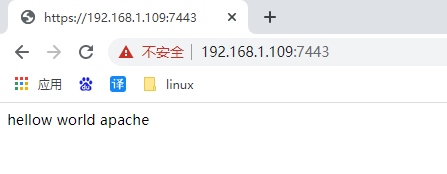
访问失败的解决方法
上面设置后,也可能失败,那就把nginx关闭,再先把 防火墙 和 SElinux 都关闭,然后重新设置一次:1
2
3
4
5
6
7
8
9
10
11nginx -s stop 立即停止nginx服务
setenforce 0
systemctl stop firewalld
#设置完后,立即执行:
systemctl restart httpd
#然后再打开 防火墙 和 sss ,
#再次访问,结果都可以了
setenforce 1
systemctl start firewalld
配置nginx为http 反向代理
配置nginx的http
/etc/nginx/nginx.conf 是nginx主配置文件。
1 | [root@localhost nginx]# nginx #启动nginx |
启动tomcat是为了后面 nginx配置转发到tomcat上的Jenkins时用;
页面即可访问:
http://192.168.1.109/ nginx驱动页面
http://192.168.1.109:8080/jenkins/ jenkins驱动页面
1 | vim /etc/nginx/nginx.conf |
解决棘手的配置重载报错
1 | [root@localhost ~]# nginx -s reload #报错 |
其实以上问题,都是一个原因,就是80端口被占用,因此当务之急就是杀掉所有 80端口占用的程序,包括 nginx自己;1
2
3
4netstat -anp |grep 80 #查看所有占用80端口的pid进程
kill -9 1796 1797 kill -9 #是固定写法,后面跟pid
nginx #成功了,不报错了
nginx -s reload #成功了,不报错了
配置nginx的http成功
127.0.0.1:7080
如上面nginx代码,
- 就是 当访问 http://192.168.1.109/ 时,将请求转发到 http://127.0.0.1:7080 上(apache服务器);
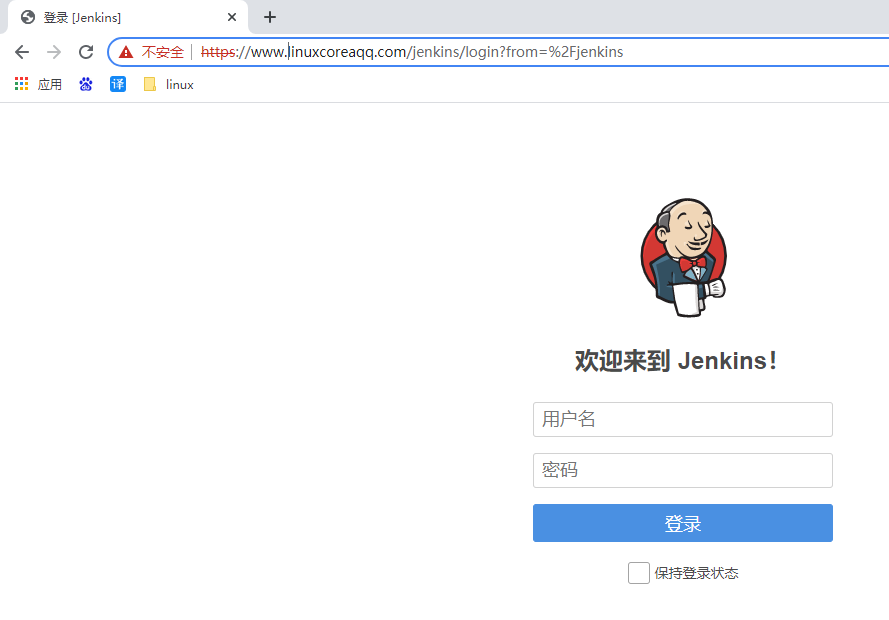
- 就是 当访问 http://192.168.1.109/jenkins 时,将请求转发到 http://127.0.0.1:8080 上(tomcat服务器);
现在访问如下,说明成功了:
http://192.168.1.109/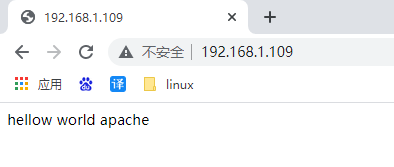
http://192.168.1.109/jenkins
客户机配置好 host后,也可通过域名访问,如
http://www.linuxcoreaqq.com/jenkins
nginx 配置https 反向代理
将所有的http请求,重定向到https请求;
生成 证书和私钥
1 | [root@localhost ~]# ls /etc/httpd/pki/ #在配置apache https时,我们生成过两个公钥 私钥,以此配置nginx; |
配置 443端口
1 | [root@localhost pki]# vim /etc/nginx/nginx.conf |
https 在主配置文件中已经配置好,只是注释了,我们要做的就是放开注释;
然后做以下修改:1
2ssl_certificate "/etc/nginx/pki/server.crt";
ssl_certificate_key "/etc/nginx/pki/server.key";
在80 端口 区块中定义:
1 | #301重定向 $host$request_uri 是nginx的两个变量,分别代表 主机地址 和url后的路径 |
并将下面配置 从 80 区块 移动至 443端口区块1
2
3
4
5
6
7location / {
proxy_pass http://backend-apache;
}
location /jenkins {
proxy_pass http://backend-jenkins;
}
完整的配置
1 | [root@localhost pki]# cat /etc/nginx/nginx.conf |
浏览器访问http 会 自动转 https
http://www.linuxcoreaqq.com/jenkins 将被重定向到https:
https://www.linuxcoreaqq.com/jenkins
过程分析
过程描述
上面首先利用 nginx 代理了所有的http请求,301重定向到 https;
从此 客户端 发往服务端的请求 都是https;
nginx 监听 443请求,接收客户端的https请求;
然后将客户端以http形式转发给 对应的服务端(Jenkins 或 apache)
nginx 拦截了所有 客户端http请求,并响应301
如上nginx拦截了所有http请求,并给它们重定向了 https, 此时nginx 相当于服务器;
nginx 监听了所有请求https,并代理转发 (反向代理)
如上 nginx 监听了所有https请求,并将它们的请求转发代理到 对应的 Jenkins 或 apache 服务器上。
优点
当所有访问都通过反向代理并且阻止对后端的直接访问时
安全性得到了增强。
如本例中, 客户端不直接访问后端,而是先与 nginx 之间进行https通信,增加了安全性;
再由nginx与后端 进行http 访问,不会被抓包。
值得注意的是
nginx 即可作为正向代理服务器,也可以作为反向代理服务器
Squid 作为代理缓存服务器
代理缓存
使用代理缓存可以让用户获得更快的资源访问,也节省带宽;
代理缓存的另一个优点是它可以授权或禁止访问某些在线资源;
网站,端口,服务,等。可以为整个局域网设置全局的安全策略;
使用代理缓存的几种方法
- 代理缓存的使用可以是可选的,非强制的
- 代理缓存的使用可以是强制且显式的,访问互联网的唯一方法是通过缓存,但用户必须手动配置其浏览器或其他应用程序
- 代理缓存的使用可以是强制且隐式的,用户无需任何配置;
Squid介绍
Squid 鱿鱼 乌贼 的意思, 即可配置为正向代理,也可以配置为反向代理服务器;
默认监听3128端口
squid 的配置文件
主配置文件 /etc/squid/squid.conf
筛选此文件的内容:grep -vE “^#|^$” /etc/squid/squid.conf
-E 是使用正常表达式 -v是取反 “^#|^$” “以井号开后|以结尾开头(空行)”
1 | [root@localhost ~]# grep -vE "^#|^$" /etc/squid/squid.conf |
http_port 指令
指定squid 监听的地址和端口
默认情况下,squid监听3128端口上所有的网络接口;
可以配置多个http_port指令,以便squid监听多个地址或端口
acl 指令
access control lists缩写表示 访问控制列表
ACL是访问控制规则,这些规则之后将被 http_access使用
用于根据这些规则允许或禁止连接
下面是acl指令
acl localnet src 10.0.0.0/8 # RFC1918 possible internal network
第二个字段是ACL的名称
具有相同名称的多个acl指令将叠加每个指令的条件
第三个字段是ACL的类型
最重要的是src 来源,
另外还有 dst 目的地, port 端口, time 时间;
第四个字段是acl的值
根据acl的类型,值可以是网络地址,端口 等等;
http_access指令
http_access指令后接 allow 或 deny
用于控制对代理缓存的访问,拒绝或允许。
使用特点,建议以deny结尾,用!表示非。
http_access deny !Safe_ports #拒绝非Safe_ports的端口
http_access deny all #httpd 的指令的结尾最好用 deny结尾,跟 switch breack一样
Squid使用举例
Squid配置和使用
服务器安装squid
安装 yum install squid
配置客户机centos
先关闭客户机;
配置网络适配器,选择桥接模式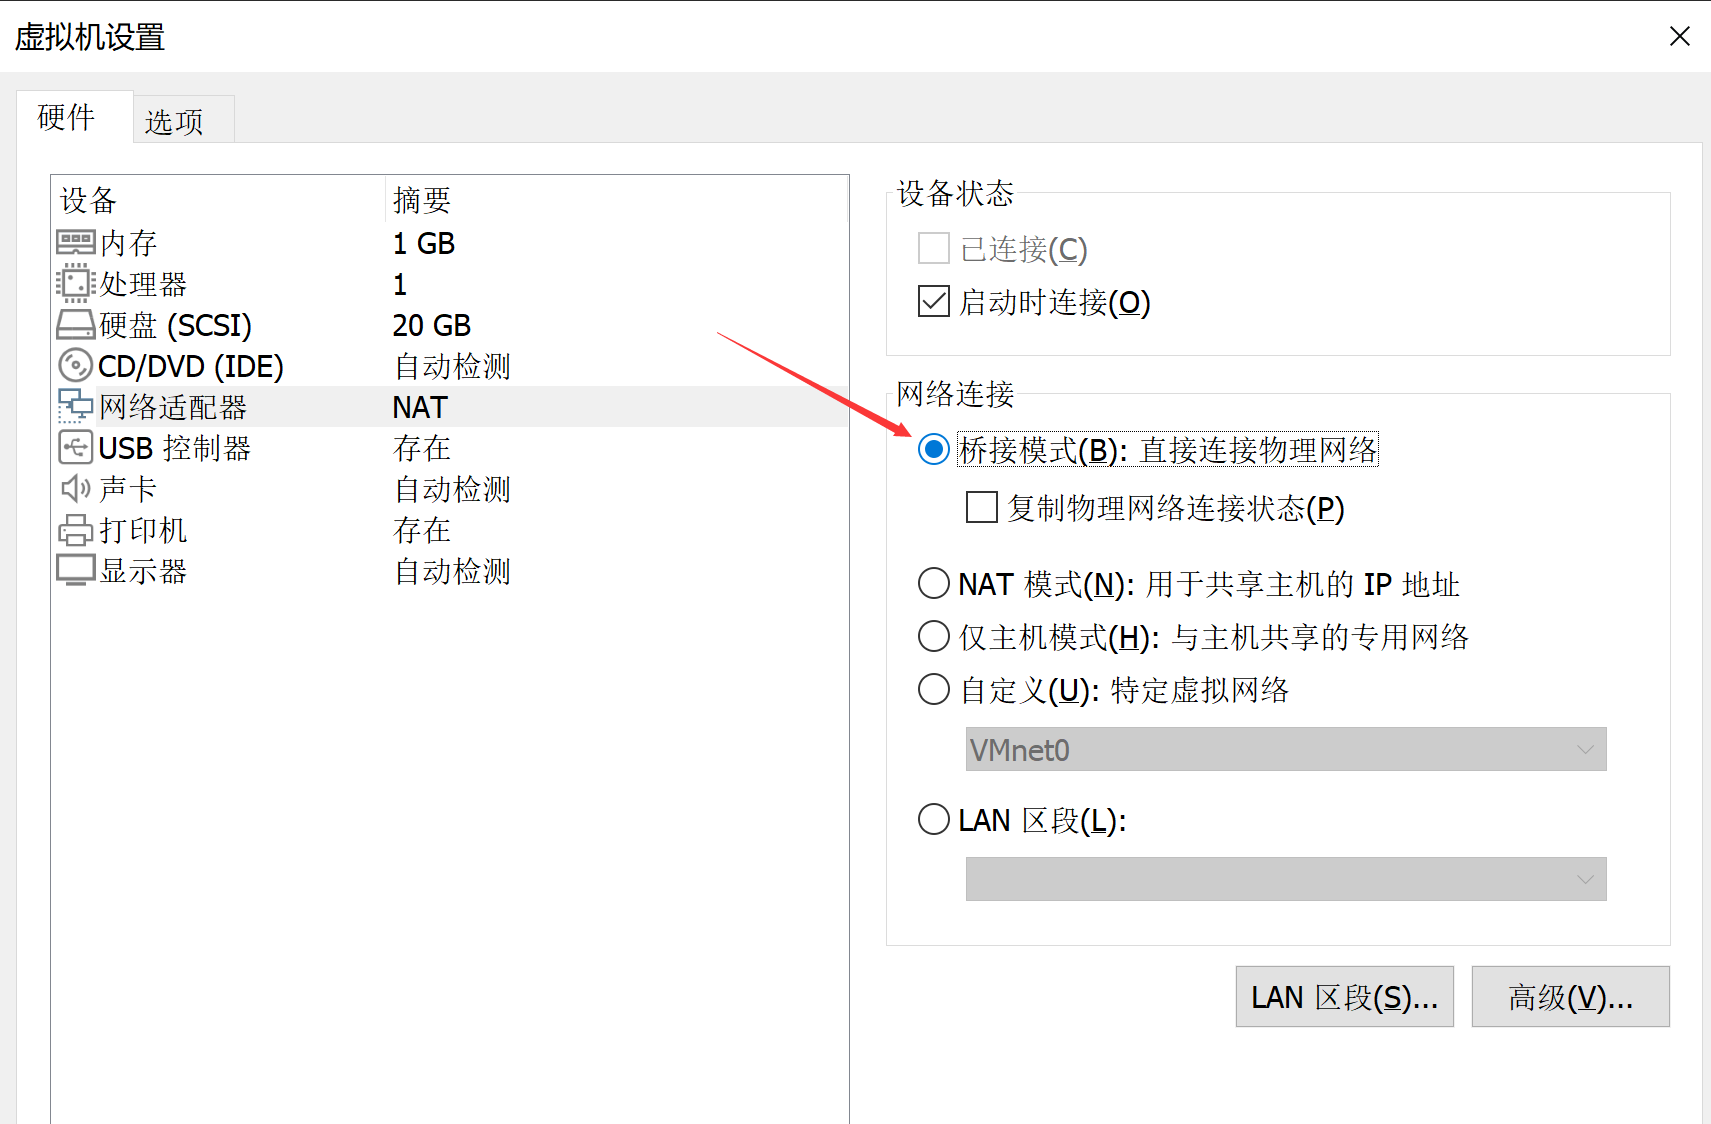
重启客户机,
目前客户机是可以正常上网的,我们将其设置为不能上网;
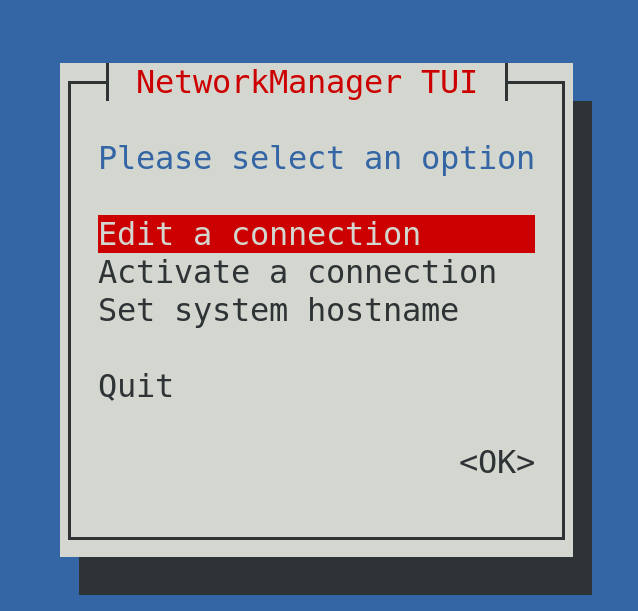
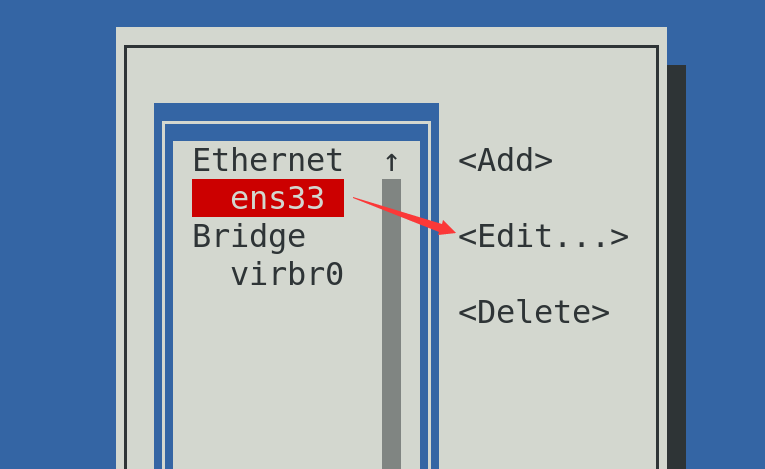
执行命令:1
nmtui
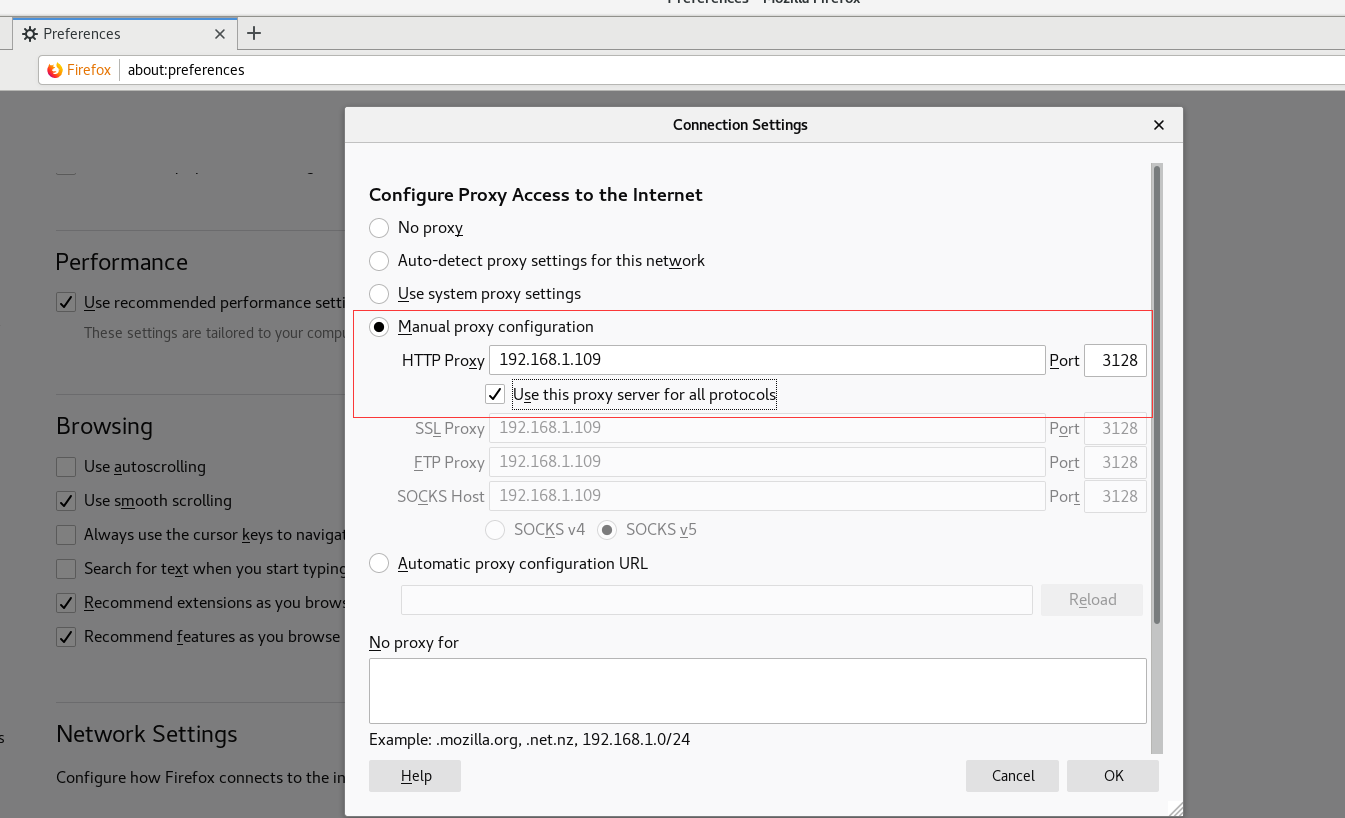
设置一个跟 服务器一样的段的地址,192.168.1.xxx, 这里设置为192.168.1.116
24是子网掩码为255.255.255.0 的意思;
网关和dns不要设置,这样客户机就不能上网,达到目的;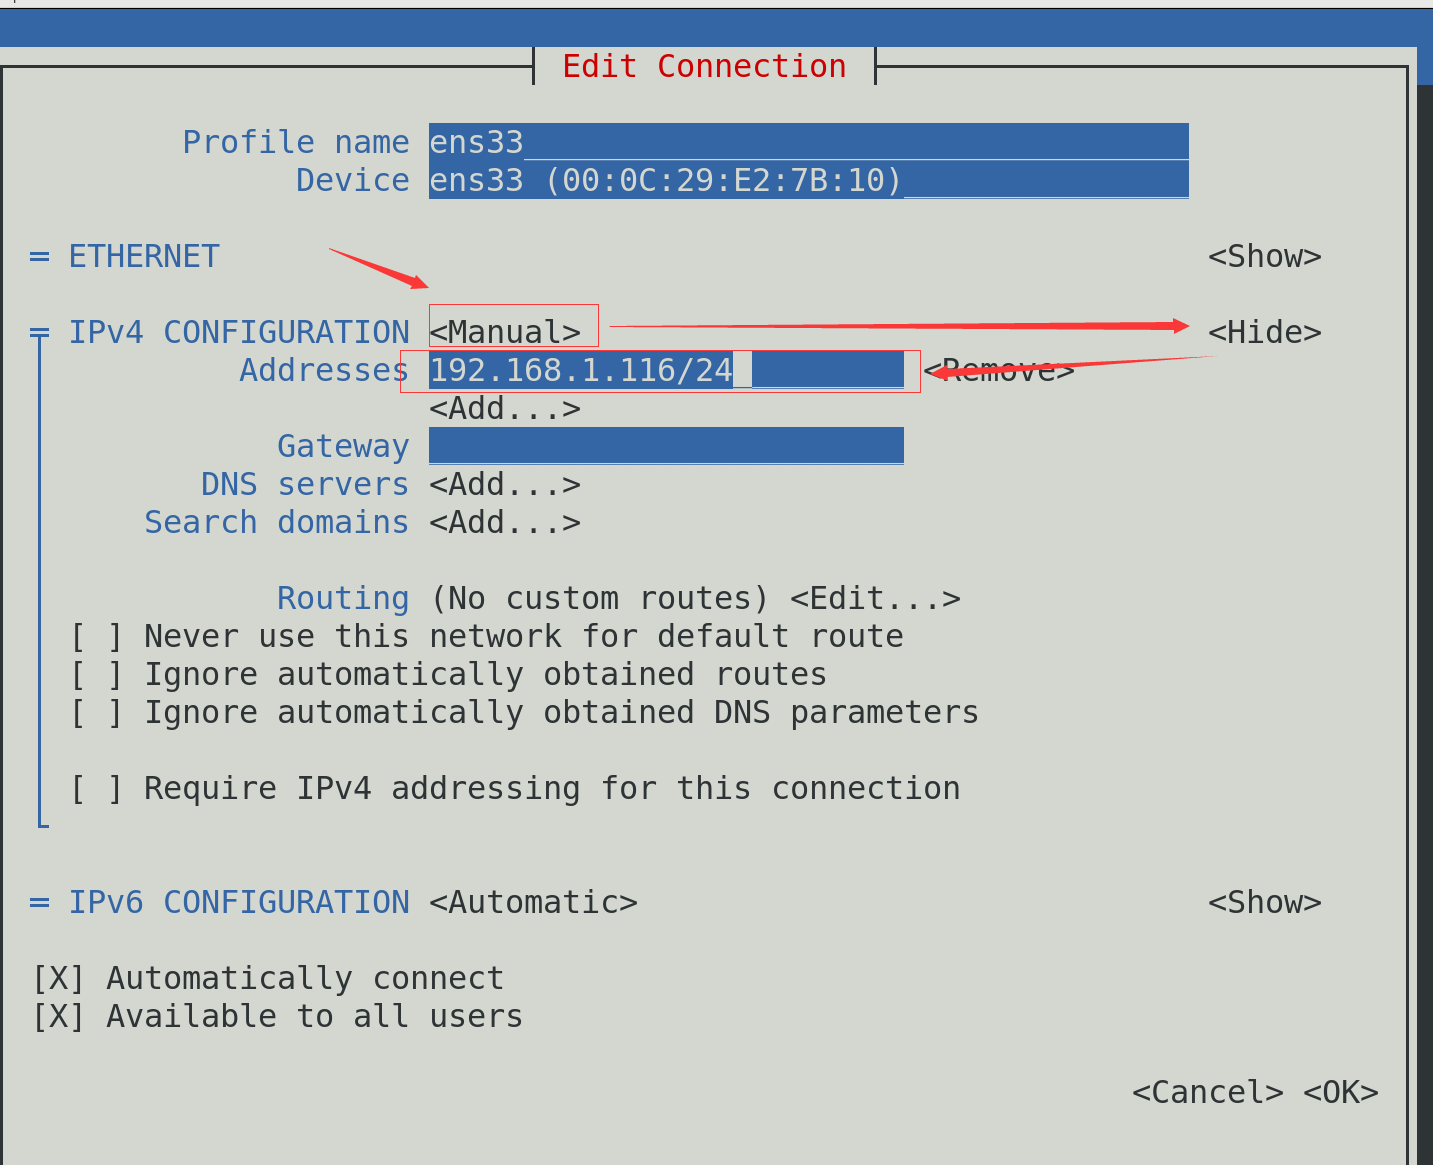
1 | [hz@localhost ~]$ systemctl restart network |
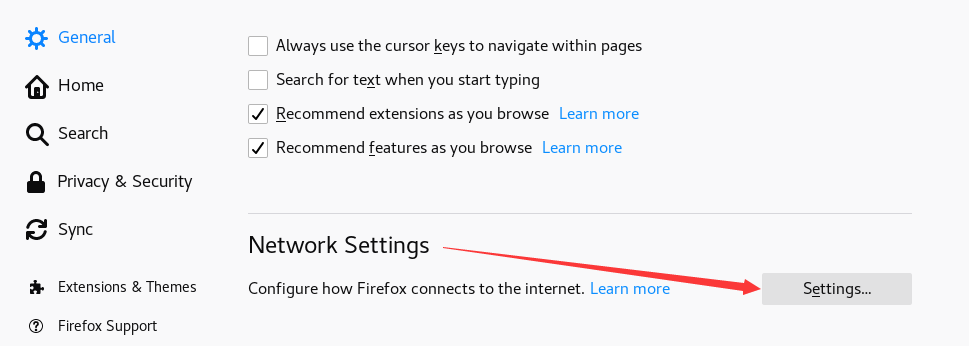
打开客户机火狐浏览器,设置如下: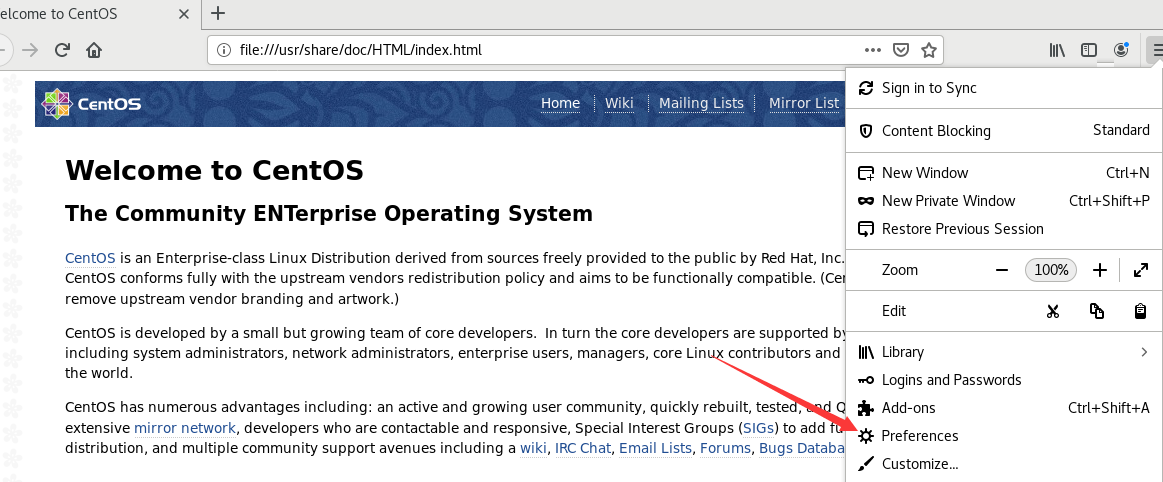
拒绝访问,原来是服务端没有开放3128 防火墙端口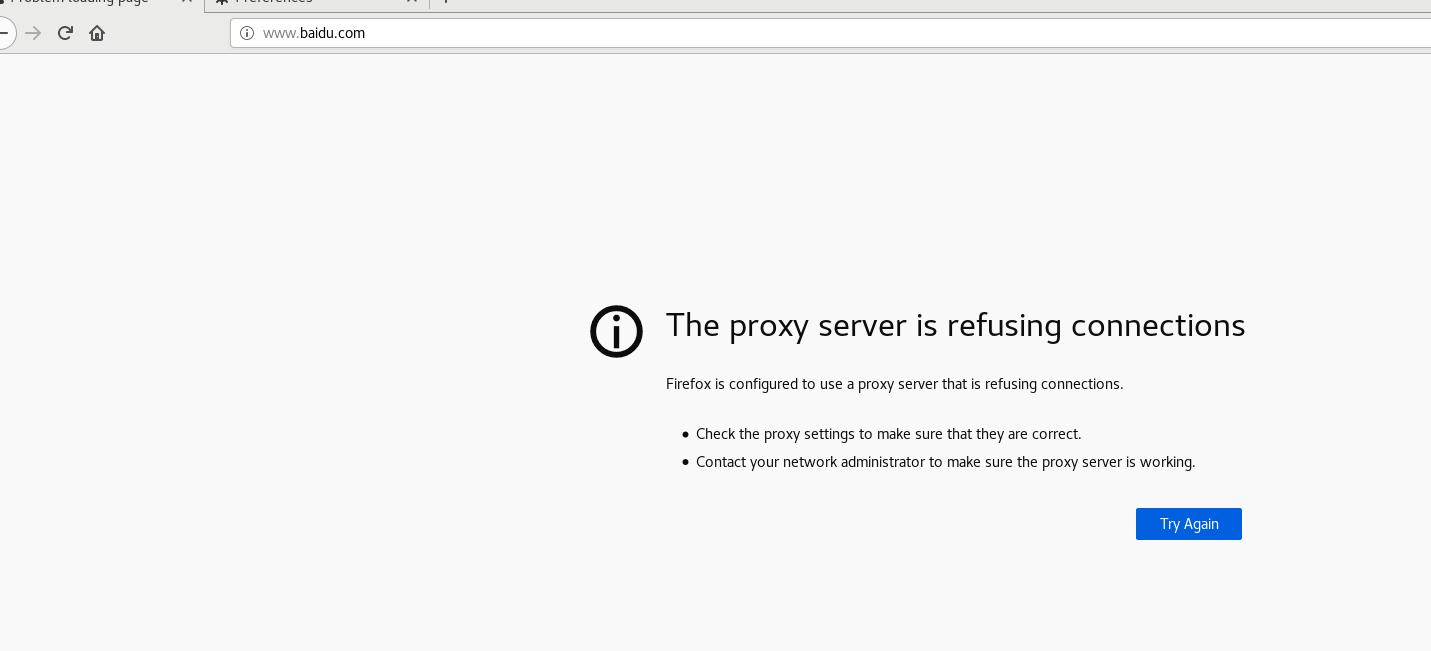
开放服务器端防火墙 3128端口
1 | [root@localhost ~]# firewall-cmd --zone=public --add-port=3128/tcp --permanent |
为什么不用设置 SElinux 端口呢,
因为 SElinux 默认开放此端口,可以这样查看1
2
3[root@localhost ~]# semanage port -l | grep squid
squid_port_t tcp 3128, 3401, 4827
squid_port_t udp 3401, 4827
遇到dns解析问题
1 | ERROR |

原来是服务端 设置dns服务器不够的原因,
设置过程参考博客1
2
3
4
5[root@localhost ~]# cat /etc/resolv.conf
# Generated by NetworkManager
nameserver 192.168.0.1 #这是原有的
nameserver 202.106.0.20 #这是新增的 北京网通的DNS服务器地址
[root@localhost ~]#
再次访问百度:
可以正常访问了
如果还遇到问题
据到服务器端,执行1
[root@localhost ~]# systemctl restart squid
另外貌似每次服务器重启后, /etc/resolv.conf 配置文件就会被重制,要重新设置。
其他应用场景
允许指定ip的客户机访问
1 | [root@localhost ~]# vim /etc/squid/squid.conf |
因为客户机 非 192.168.1.107, 因此挂掉了。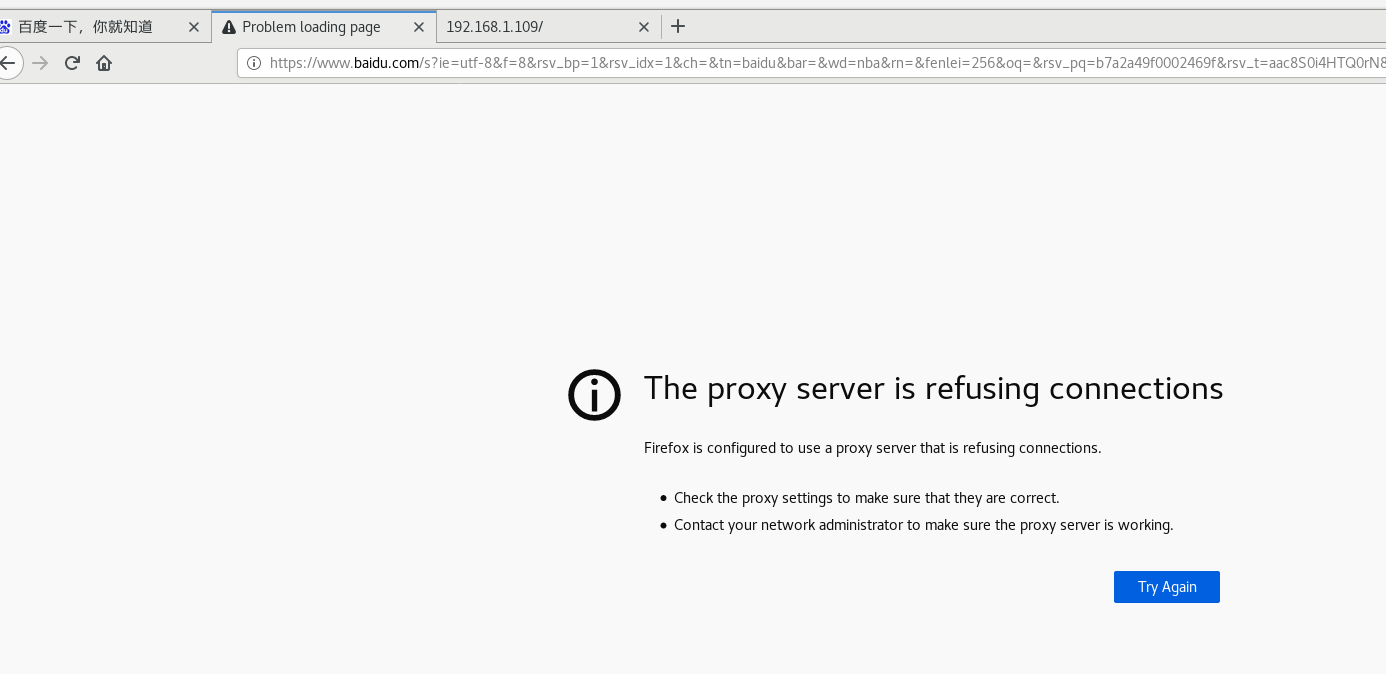
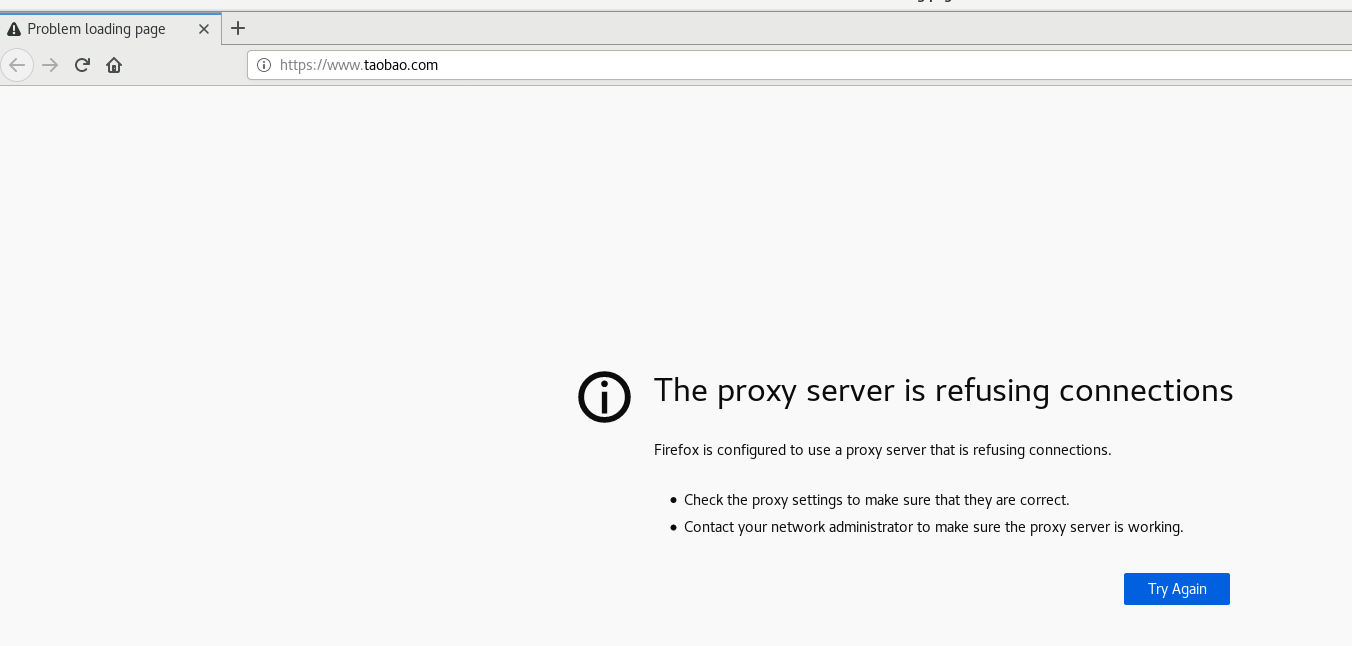
禁止访问指定关键字url
禁止url包含taobao的页面访问,1
2acl deny_keyword url_regex -i taobao #url_regex 类型是url, 使用正则表达式匹配规则 -i表示忽略大小写
http_access deny deny_keyword
禁止特定网站
1 | acl deny_url url_regex www.imooc.com #url_regex 类型是url, 使用正则表达式匹配规则 禁止www.imooc.com 访问 |
禁止下载指定类型的文件
1 | acl deny_file urlpath_regex -i \.rar$ \.avi$ \.zip$ \.exe$ # urlpath_regex 类型是urlpath, 禁止文件下载 |